|
|
|
|
|
Paint Shop Pro Tutorials
-
Before You Start..
-
Background Techniques
-
Text Techniques
Download Paint Shop Pro
- Ok. So first, go to jasc.com, or just go straight to this linkHERE. Find where it says "paint shop pro 8", and click the link that says "FREE Trial".
- Next, it's gonna make you fill out some information about yourself. Just fill out your name, email, etc. When you are done hit the 'continue' button on the bottom again.
- Now, a window will pop up to download Paint Shop Pro. Click the "Save" button and save it in a folder that you will remember to find it in. (also, try to remember what the file name of this program is)
- The download may take a while (depending on your connection), so sit back and relax until it finishes.
- When the download finishes, click the 'start' button on the bottom left corner of your screen and then click 'Search'. In the search box, search for the file name of the Pain Shop Pro you just downloaded. (Or, if you remember where you saved it, just go to start>>all programs>>accessories>>windows explorer.... and find the file that you saved the program in.)
- When the program comes up in search (or you find it on your own in windows explorer) click it and it should take you to the Installation Process. Installation is easy, just read what the boxes say and hit next. If you need help with installing, get a parent to help you.
- After installation is complete, it should lead you right to the program. (if it doesn't, just go to start>>search>> and search for animation shop). Double click the animation shop icon to open it.
NOTE: This is only a free trial of paint shop pro. It will only run for about 30 days. After that, you need to buy the actual softwear. Also note that i have actually never used paint shop pro 8--- I use paint shop pro 7. I am guessing that they are pretty simliar, so my tutorials below should work on paint shop pro 8 :)
Making Gradients
- Open paint shop pro.
- Click the icon in the toolbar at the top that looks like a sheet of white paper (it says "new" when you hover it").
- When the "new image" window comes up, make sure the width and height of the new image is 48 x 48 pixels. Make the background color be white.
- Go over to your colors toolbar and look in the "styles" portion of the toolbar.
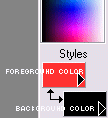
- In this "styles" portion of the toolbar there are two boxes that are used to select a background and foreground color. The box on the top is the foreground color box, and the box on the bottom is the background color box. Both of the boxes have little black arrows on them. Click the little arrow on the box on the top and select the "gradient" icon (it looks like a little shaded square).
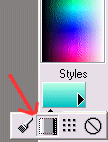
- You will now notice that the foreground color box is no longer just a solid color, it is now a mixture of two or more colors fading together, or a "gradient". Click inside the box for the gradient window to come up.
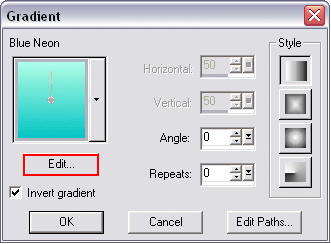
- In this window are many options. If you click the scrollbar that is right next to the current gradient, it will show a list of default gradients that already came with your psp7. To make a new gradient, select any gradient and click the "edit" button located underneath the selected gradient.
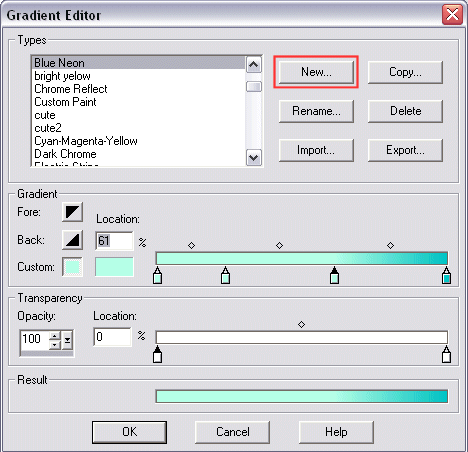
- This brings up a new window called the "gradient editor". On the upper right portion of this window is a button called "new". Click it and then give your new gradient a name. Then hit OK.
- Now you can edit your gradient. The little colored bar on the TOP is where you edit your gradient. To change the colors of your gradient, click the little marker images and then click the color box located directly left of the gradient bar. When you click this, the color window will pop up. Here, you can change the color of that portion of the gradient to anything you want.
- To add more markers to the gradient (which will add more different color portions to the gradient), you can click ANY spot in the area right underneath the gradient bar. When you click any spot, a marker will automatically appear. You can then change the color of your new marker.
- To move around your different markers to give your gradient a different color order, simply click and drag the marker to anywhere you want.
- To get rid of any markers, simple click and drag the marker up into the bar. It will then dissapear.
- Wondering what the little colored bar on the BOTTOM is? This is where you can set a transparency to your gradient. In order to set transparencys, select an available marker and change it's opacity (or transparency) by changing the opacity number in the scrollbar directly to the left of the transparency bar. You can add more markers for more transparency areas, and move the markers around the same way as you would do for the gradient bar above.
- When you are all set with your gradient, click OK.
- You will then see the regular "gradient" window again, which has some options that can enhance your gradient. On the very right of the window is a section that says "style". Try clicking those little boxes inside the style secton to change the appearance of your gradient. Also, you can invert your gradient (make the colors opposite of what they really are) by selecting the "invert gradient" box located underneath the deafault gradient. You can also change the angle and repeats of your gradient by changing the numbers in the "angle" and "repeats" boxes.

- When you are all set with the style of your gradient, click OK.
- Next, click the paintbucket icon on your toolbar (should be on the left side of the screen).
- Go to the foreground color box, and make sure that the gradient you just made is your default gradient.
- Finally, use the paintbucket tool to fill in the entire area of your image with your new gradient!

Make a Border Around Your Text
- Open psp, and click the icon in the upper toolbar that looks like a white sheet of paper to open a new image. Make sure the width and height of the new image is 48 x 48 pixels, and the background color is white.
- Now select the paintcan icon on the leftside toolbar, and change the foreground color in the color toolbar to the color that you want the border of your text to be. Click inside your image with the paintcan tool to fill the image completely that color.

- Select the "A" icon in the left side toolbar (the text toolbar), and using that tool click anywhere inside your image. The "Text Entry" window will now pop up. There are many options in this window -- you can change the font, font size, font colors, style, and more. For now though, just make everything looks exactly the same as the way I set mine up below. MAKE SURE that there is no stroke color selected. Click ok when you finished filling in all the entries as shown.
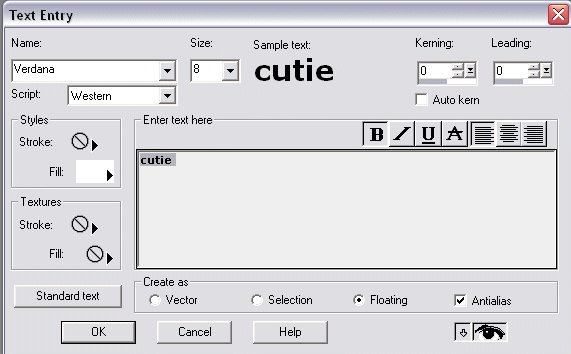
(click picture to enlarge)
- Now you will notice that there is text in your image. This text is automatically selected, so you can hold down your mouse on top of the text to drag it anyplace on the image.
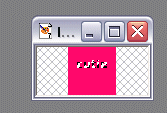
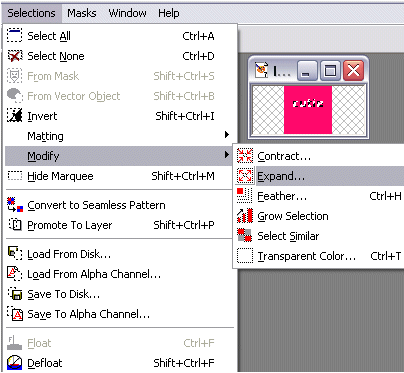
- While keeping the text selected (keeping the dotted lines around the text) go to "selections" on the top toolbar, then "modify", then "expand".
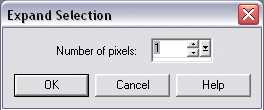
- The "expand" window will now come up. Make it so it expands by 1 pixel, and click OK. (if you want a thicker border, make it be anything higher than 1)
- Your text will still be selected after this, so while it is selected now go up to the tool bar on the top and go to "edit" and "cut".
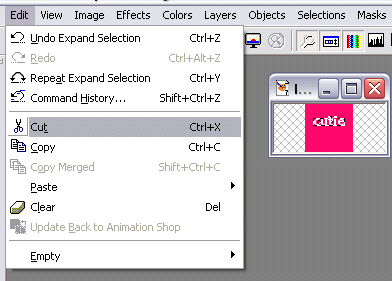
- Now open another new image, width and height 48 pixels, background color white. Go up to "edit", then "paste", then "paste as new selection". Now go up to "Selections" in the upper toolbar and do "select none". You will now see your text with a pretty border! It is much quicker making a border this way than drawing one pixel by pixel in paint!

Note: To incorporate your newly made text into an icon that you made, simply keep the text selected, copy it, and paste it as a new selection into your doll icon image.
3D Text Effects
- Open psp, and click the icon in the upper toolbar that looks like a white sheet of paper to open a new image. Make sure the width and height of the new image is 48 x 48 pixels, and the background color is white.
- Next, follow step three in the "Make a Border Around Your Text" instructions. You can, however, make the text look anyway you want. You don't have to make it look exactly as mine. Just make sure no stroke color is selected.
- You will now notice that the text is automatically selected (has dotted lines around it). While the text is selected, go to the top tool bar and select "Effects" and then "3D Effects". It will show you a list of effects to choose from.....
Note: To incorporate your newly made text into an icon that you made, simply keep the text selected, copy it, and paste it as a new selection into your doll icon image.
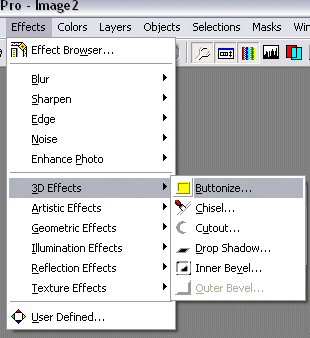
Buttonize
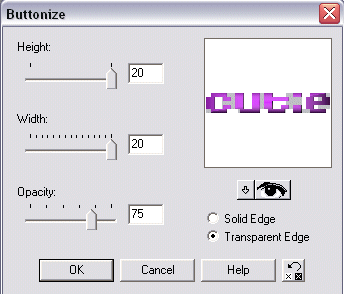
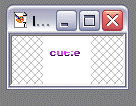
- The buttonize effect will make your text have the appearance of a three demensional edge and make it look like a button.
- Buttonize effects window instructions: The height selection will change the size of the 3d edges on the top and bottom of the text. The width selection will change the size of the 3d edges on the left and right sides of the text. The opacity will change how transparent the edges are. The higher the opacity number, the more dark the edge will be -- the smaller the opacity number, the more transparent your edge will be. The "Solid edge" selection will make all of the colors in your edges be solid rather than colors blending together, and the "transparent edge" seletion will make the edges be transparent, so the actual color shows through.
Result:
Chisel
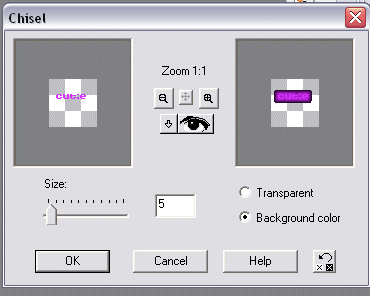
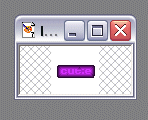
- The chisel effect will make your text have multiple borders that gradually get darker.
- Chisel effects window instructions: You can change the size of the chiseled borders around the text by using the arrow to select any number. A higher number makes the borders thicker, while a small number makes the borders thinner. If you select the transparent button, it will make the chiseled borders blend in with the color of your background. If you select the background color button, it will make the colors of the chiseled borders be the color of your selected background color in your color toolbar.
Make sure you have a nice color selected for your background color in order for this effect to turn out right. Also, this effect works best with pixel fonts such as "redensek" or "ooh lah lah".

Result:
Cut Out
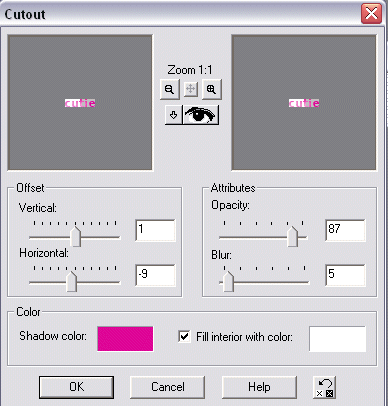
- The cut out effect will cut out a portion of your text and replace it with a brighter color that blends in with the rest of the darker color.
- Cut Out effects window instructions: The vertical and horizontal offsets change the direction and placement of the portion that will be cut out. The opacity attribute changes the transparency of the cut out portion. The higher the opacity number, the more dark the cut out portion will be -- the smaller the opacity number, the more transparent your cut out portion will be. The blur attribute changes how well the cut out portion mixes into the original color. The higher the number, the more it blends in with the original color -- the lower the lighter, the less it blends in with the original color. The shadow color selects what your original color will be.
Result:

Drop Shadow
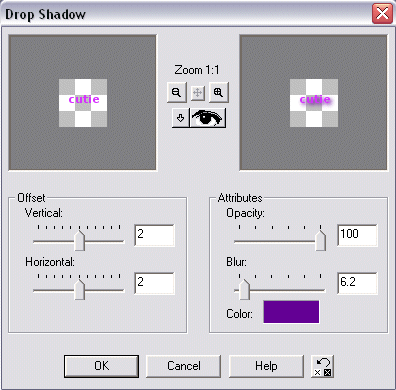
- The drop shadow effect will add a shadow around your selected text.
- Dropshadow effects window instructions: The offset area is where you determine what direction your shadow is going to be in. You can change the numbers in the vertical and horizontal spaces to any numbers you want to change the direction. The attributes"area is where you can change the opacity, the blur, and the color of your shadow. The higher the opacity number, the more dark the shadow will be -- the smaller the opacity number, the more transparent your shadow will be. The blur attribute changes the density of the shadow: the higher this number, the less dense the shadow will be (it will be lighter)--- the lower the number, the more dense the shadow will be (it will be darker). You can also change the color of your shadow to anything you wish.
Result:
Inner Bevel
- The inner bevel effect will make your text have the appearance of a three demensional edge
- Inner Bevel effects window instructions: This effect is kind of complicated, I am not even very good at it lol. I guess all I can say is fool around with all of the numbers and angels and colors and bevels until you see something that looks similar to mine! It will make your text have a 3d edge in the end, and it will look really cool! You should set up your numbers just like I did in my inner bevel, and just edit it from there to set it to your liking.

Result:

Privacy Policy/Disclaimer
Copyright © Doll Buddie Icons 2004
|
|
|
Fatal error: Call to undefined function: release() in /webroot/d/o/dollb001/www/index.php on line 884
|
|