|
|
|
|
|
"Paint" Tutorials
-
Outline text and make it 3D
-
Make text have a dropshadow
-
Make a Star
-
Make a heart
A. Outline text and make it 3D
- First, open you "Paint program" by clicking "start>>All Programs>>Accessories>>Paint".
- Make sure you have a plain white new file open.
- Use the text icon in the toolbar (the black A) to make some text. Make the font be verdana, the size be 8, and the style be bold. Just write a small word, like "heya". You can use any shade of color.

- Now, use the zoom in icon in the toolbar (looks like a magnifying glass) to zoom in your text as much as you can.
- Double click the shade color that you selected, then click "define custom colors" and tweak it a little bit so that it is slightly darker.
- Now that you have a new color selected, use the pencil icon in the tool bar to draw a thin border around all of your text.

- Next, double click that shade of color again and tweak it so it is very light (almost white). Use this color to draw little lines in the upper left hand corner in all the letters of your word. This will make your text look 3d!
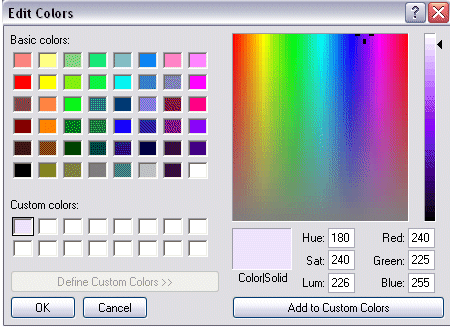

- Use the magnifying glass icon to zoom out, and your cool looking text is all done! :)

B. Make a Drop Shadow
- First, open you "Paint program" by clicking "start>>All Programs>>Accessories>>Paint".
- Make sure you have a plain white new file open.
- Use the text icon in the toolbar (the black A) to make some text. Make the font be verdana, the size be 8, and the style be bold. Just write a small word, like "heya". You can use any shade of color.

- Next, select a new grayish shade of color in your color toolbar.
- Select the text icon again, and make new text, but make sure you make it the same word as you did in step 3.

- Now use the magnifying glass to zoom in as much as you can. Make sure both of your words are in view.
- Use the dotted line square icon to select only the text that you made in step 3 (drag the dotted line so that it is completely surrounding the text). Make sure that transparency is set by clicking the little picture on the very bottom that is underneath the whole toolbar on the left.
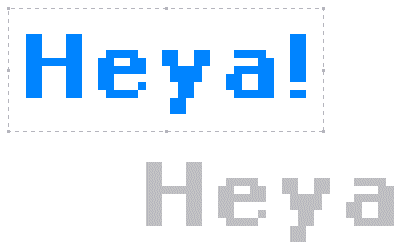
- Now that this text is selected, move it so it is on top of the grayish colored text. Make sure, thought, that part of the gray text is showing underneath.
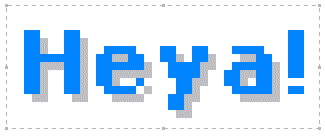
- Use the magnifying glass icon to zoom out, and your cool looking text is all done! :)

C. Make a Star
- First, open you "Paint program" by clicking "start>>All Programs>>Accessories>>Paint".
- Make sure you have a plain white new file open.
- Use the magnifying glass to zoom in as much as possible.
- Next, use the pencil tool in the toolbar to draw a shape that looks like the one below.. (it should have one pixle on the very top, then 5 pixels below it, then 3 pixels, then 2 pixels on the very bottom with an empty pixel in the middle). You can use any color you want.

- Next, double click that color you selected and tweak it so it is slightly darker. Use the pencil tool again to draw a thin border around your star.
- You can tweak the color so it is slightly lighter and draw little pixels in the top left corner if you want to make it look 3D.

- Use the magnifying glass icon to zoom out, and your cool looking text is all done! :)

D. Make a Heart
- First, open you "Paint program" by clicking "start>>All Programs>>Accessories>>Paint".
- Make sure you have a plain white new file open.
- Use the magnifying glass to zoom in as much as possible.
- Next, click the paintbrush tool in the toolbar. It should show a bunch of selections to pick for your brush, but pick the circle that is on the very top in the middle.
- Select a pinkish color, and then use the paintbrush to draw 2 circles that are right next to each other. All you really need to do is do 2 clicks with the brush.

- Next, click the pencil tool in the toolbar. With the same color selected, fill in that little dot in the middle of the 2 circles, and then add 2 more layers of lines on the bottom of the heart. Make the first layer be 3 pixels, and the second be only 1 pixel.

- Next, double click that color you selected and tweak it so it is slightly darker. Use the pencil tool again to draw a thin border around your heart.
- You can tweak the color so it is slightly lighter and draw little pixels in the top left corner if you want to make it look 3D.

- Use the magnifying glass icon to zoom out, and your cool looking text is all done! :)

Privacy Policy/Disclaimer
Copyright © Doll Buddie Icons 2004
|
|
|
Fatal error: Call to undefined function: release() in /webroot/d/o/dollb001/www/index.php on line 884
|
|